Engage Your Students with Interactive Lessons Using Nearpod
Welcome back to another post. How are you all? Hope you are doing well and staying safe. 😊


If you've had an account, you can directly sign in.


In this post, I'd like to talk about Nearpod, an online tool that helps teachers make interactive lessons. This tool offers a lot of features as well as learning materials. With Nearpod, not only can the teachers compile their own files such as PDF files and PowerPoint slides in one lesson, but they can also combine their materials with all features from Nearpod such as quizzes, exercises, slideshows, and many more. Nearpod allows us to arrange a wide range of materials, exercises, and activities and unite them into a single lesson. This lesson can then be shared with all students through a link to learn or do a review. Teachers can be creative and organize the lesson to meet students' needs. Now, let's see how to make a lesson using Nearpod through the following steps:
1. Open https://nearpod.com/ and sign up for free. You can sign up using your Google or Office 365 account or you can sign up to the website by providing an email and a password.


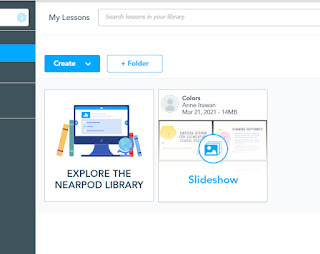
2. After you sign in, you'll be directed to the homepage. To create a lesson, click the "Create" button and click the "Lessons" button.

3. After that, you can begin making your lesson. You can also rename your lesson. In organizing the learning materials, you can use your own materials by dropping your files or uploading files from your computer. In addition, you can also customize your lesson using the features from Nearpod by clicking the "Add Content & Activities" button.

4. After that, you'll see all features of "content". There are 11 tools in the content section. The tools here are intended to teach students and show the learning materials. Teachers can show videos, pictures, slides, audio files, 3D pictures, and so on. Click the tool to use it and save your work afterward to put it in your lesson.

5. Nearpod also offers other tools that teachers can use to make exercises, quizzes, and other activities that require students to think and collaborate with the teachers and other students. Click the "Activities" button beside the "Content" button. There are 10 tools in the activities section. Click the tool to use it and save your work afterward to put it in your lesson.

6. After you've done making your lesson, you can get an overview of your lesson from the students' perspective by clicking the "Preview" button. While you are "previewing" your lesson, you'll be able to see all your materials there and you can even put an answer as if you are a student. After that, click the "Save & Exit" button to save your lesson. You can always go back and edit it again if needed.

7. Your lesson is finished! After you click the "Save and Exit" button, you'll be directed to the homepage and your lesson will appear there.

8. Put your cursor on the lesson to see what you can do with your lesson.

-You can share your lesson in real-time by clicking the "Life Participation + Zoom" button. You will get a code of your lesson and you'll also be able to launch a zoom meeting for your class too.
-If you just wish to have a real-time lesson code without Zoom, click the "Live Participation" button.
-To distribute your lesson as homework for students, click the "Student Paced" button. You will get a code that your students can access to see the materials and do all the exercises. You'll also be able to set the due date of the homework and set whether you want your lesson to require answers from the students or not.
- You can also click the "Edit" button to make some changes to your lesson and click the "Preview" button to see how your lesson will look like. - You can also click the three-dot button on the top right side and click the "Share With Teachers" button to get the link of your lesson and an editable link that allows everyone to make changes to the lesson.


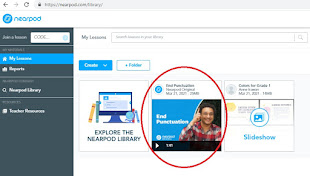
9. Last but not least, you can also check some materials in Nearpod Library which you can access on the homepage.

After you click it, you will see a wide range of lessons, videos, and activities that you can insert into your lesson. You can type keywords for searching the lessons that you want or you can tick several boxes on the left side of the page to specify what materials (lessons, activities, videos), states, subjects, grades you are looking for.

If you've found any videos, lessons, or activities that you want to use, put your cursor on top of it and click the + button. The material would appear on the homepage.


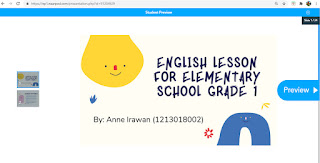
In addition, I've made a lesson using Nearpod which you can access here: https://share.nearpod.com/Y8CmuutJUeb
Making lessons using Nearpod may be quite complicated since there are 21 tools from Nearpod that you all should explore. 😮 But those tools are actually what would make your lesson interactive and engaging. And also, don't forget to check out Nearpod Library! They do offer a lot of wonderful ready-to-use lessons, videos, and activities that might be useful for your lesson.
Thank you all for reading this post. Hope this post would be inspiring and helpful for you in making your own lesson using Nearpod. I can't wait to see your amazing lessons! Good luck, everyone. 😊


Comments
Post a Comment