Turning Videos into Meaningful Lessons Using TED-Ed
Hi, everyone! Welcome back to another post. 😊 How are you? I hope you all stay safe and healthy during this situation.
In this post, I'd like to tell you all about one of the exciting features of TED-Ed: TED-Ed lessons.
Probably most of you are already familiar with TED talks and TED videos. Some teachers may access and share TED-Ed talks and videos inside the classroom for many purposes such as learning English. But, do you know that TED-Ed also provides video-based lessons?
Under the slogan 'Lessons Worth Sharing', TED-Ed lessons contain exercises, activities, and discussions that are already perfectly designed. They are wonderful learning resources and they definitely help save teachers' time. But, what makes them even better is that we can create our own lessons to facilitate our needs! So, let's check out how to make our own TED-Ed lesson here:
1. Open TED-Ed website: https://ed.ted.com/ and sign up to make an account. If you've signed up previously, you can directly sign in using your Apple, Google, or Facebook account.
2. Click the Create button, and then choose A Lesson.
3. Then, you are required to find a YouTube video to use as the main material of the lesson. Paste the link of the YouTube video in the box. If you haven't figured out the YouTube video you wanna use yet, you can search for one by typing some keywords. After you have found the video, click the video and click Continue to proceed to the next step.
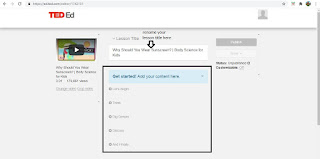
4. You can now add details to your lesson. You can write down your lesson title first, to begin with. Then, you can begin adding several instructions and questions. There are 5 sections in the TED-Ed lesson:
- Let's Begin: You can introduce your lesson in a few sentences to grab the audience's attention.
- Think: You can insert Multiple Choice Question and/or Open Answer Question for students to answer.
- Dig Deeper: You can provide some supplementary information to your students. You can put website links you wish to share and/or attach pictures.
- Discuss: You can give instructions, questions, or prompts for students to respond in the discussion forum.
- And Finally...: You can give closing thoughts for your lesson


Comments
Post a Comment